This month, I want to discuss the junk drawer. You might be wondering why such a forgotten drawer is getting this attention. Well, just about everyone has a junk drawer, or two, in their home and I believe that just because it’s a junk drawer doesn’t mean it has to be disorganized.
Junk drawers usually contain random, miscellaneous items that are co-mingled with stray wires, batteries, restaurant menus, various small trinkets that may or may not work and dozens of pens from hotels or doctor’s offices because no flowers were taped to the top of them. Sound familiar? Ok, that description is truly a junk drawer. But does it mean everything in the drawer is actually junk?
Google defines junk as, “Old or discarded articles that are considered useless or of little value.”
“A drawer designated for the storage of various miscellaneous, small, occasionally useful items of little value.”
A Junk Drawer according to Wiktionary
So, by definition, that would mean many things in our junk drawers are junk and without thinking about theses things we should be able to just throw it all away…. right? That’s a thought. However, I bet you would beg to differ because there might be something incredibly useful or perhaps some things that “I might need one day” hidden in that drawer just waiting to be used again.
I’d like to go with the idea that there is always something useful in the junk drawer which is exactly why the junk drawer needs to be organized. After all, Wiktionary says a junk drawer is, “A drawer designated for the storage of various miscellaneous, small, occasionally useful items of little value.”
So, let’s get down to business and organize your junk drawer and find out what useful things you might have in there! Remember this is a junk drawer so don’t put too much thought into what stays and what goes.

Let’s get organized!
Here are 10 very easy steps to de-junk your junk drawer in less than 20 minutes!
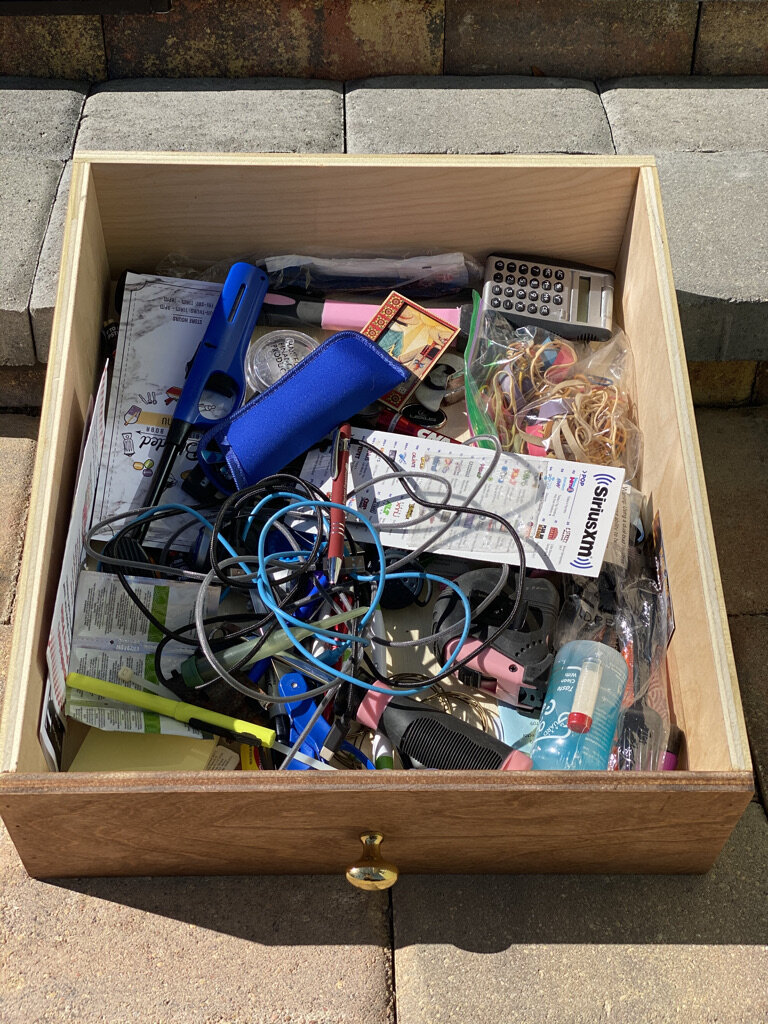
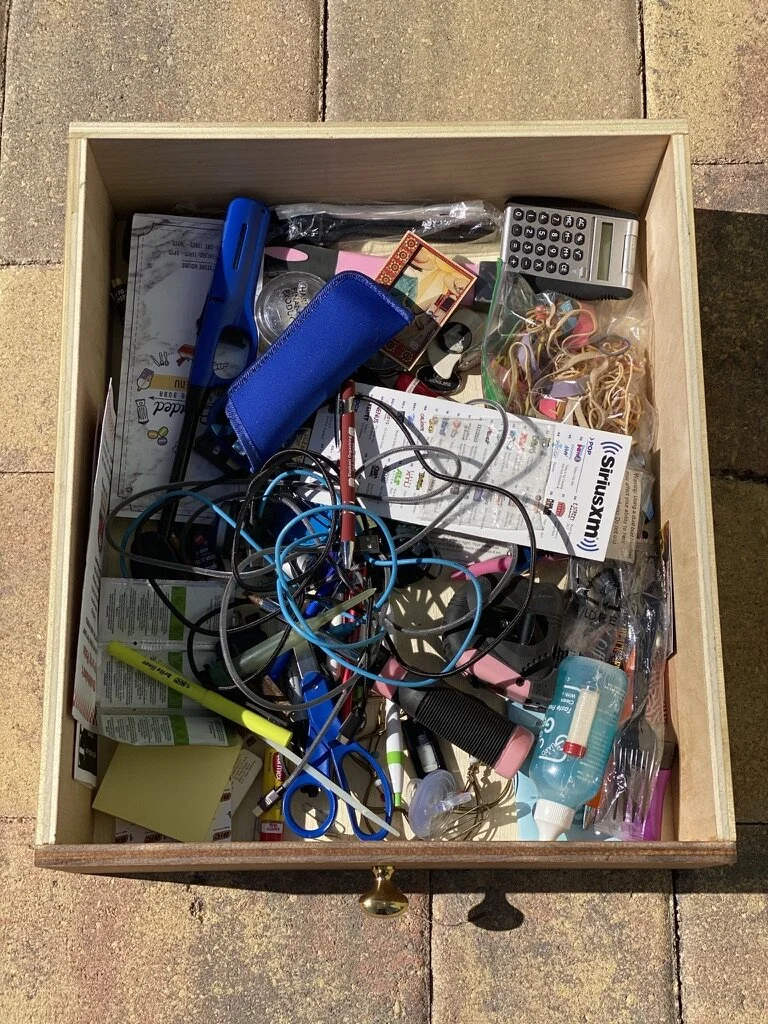
Here is our “BEFORE” image
1. Take a “BEFORE” photo of your junk drawer.
2. Get three (3) bins or bags and label each one with either TRASH, RECYCLE or DONATE. (see above image)
3. START YOUR TIMER! Now dump the contents of your junk drawer on the counter. That’s right, just dump it all out.
4. Begin sorting and purging the pile on the counter. Put “KEEP” items in the drawer (don’t worry about the arrangement of those items just yet). The rest of the items will either go in the TRASH, RECYCLE or DONATE bin or bag until you have gone through the entire pile. Set the three bags or bins aside.
5. STOP THE TIMER! That wasn’t too bad was it? How long did it take you to sort and purge the contents of your junk drawer? Less than 20 minutes?
Now it’s time containerize the items that you decided to keep
Ask yourself these questions:
· Do you already have drawer dividers, bins or baskets in your junk drawer?
· If you do, will they contain the items in your drawer appropriately?
· If not, do you have anything in your home you can re-purpose to contain these items?
· If not, you might want to purchase a few small bins or baskets to contain what will continue to live in your junk drawer. This is important because if you don’t contain the items in your junk drawer, there’s a very good chance your drawer will end up messy again!
· If you have to purchase containers for your junk drawer measure the dimensions of your drawer to make sure you purchase the right size(s) to fit into your drawer.
There are many places where you can purchase bins or baskets for your junk drawer. The organizational products you will need to purchase will depend on what you have decided to contain in your drawer and how much you want to spend on this project. (Below, I have a list of bins I use and love.) For my junk drawer, I went to the Dollar Tree down the street and spent $3 on 9 little baskets (see in below images): after all it’s a junk drawer, no need for a major investment!
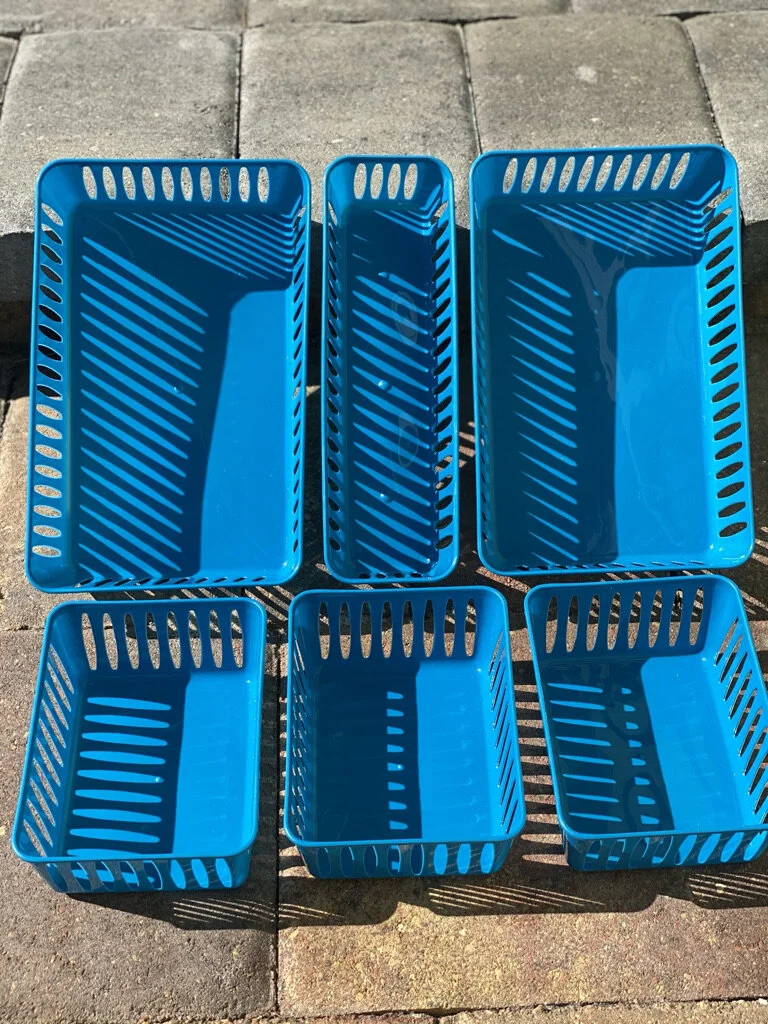
Dollar tree containers I picked up for my junk drawer
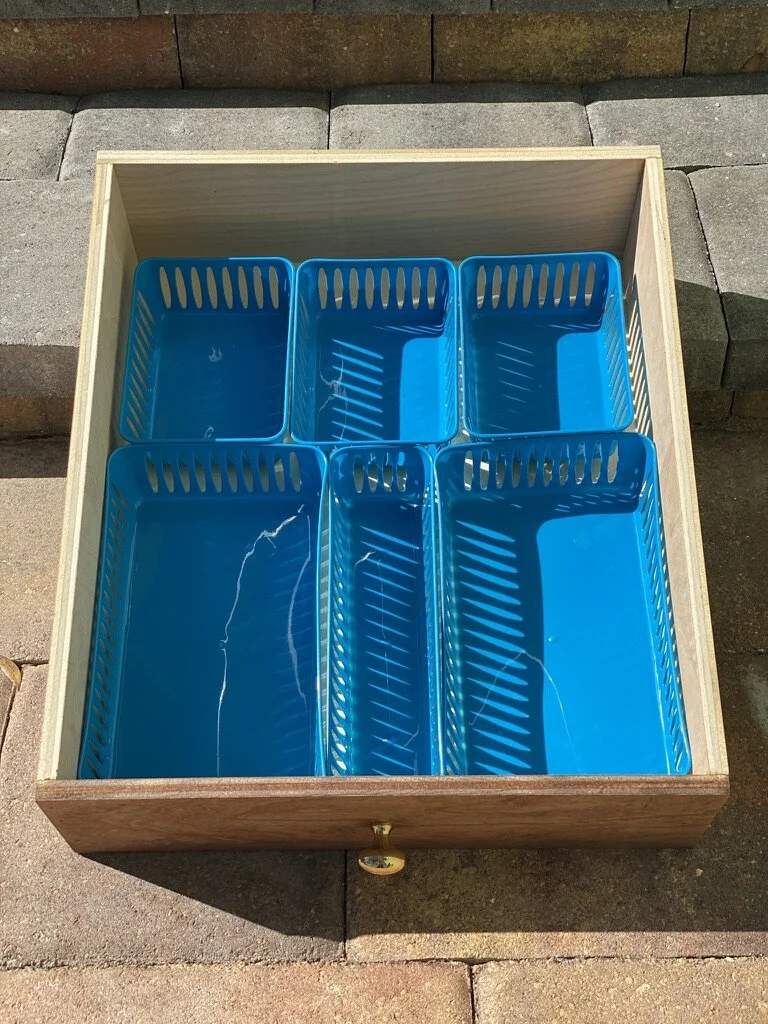
Here is how they sit inside of the drawer
6. Now that you have what you need to contain the remainder of the items in your junk drawer, move the items out of the junk drawer by assembling your "KEEP" items together on your counter using the idea of “like items with like items” as best you can. By “like items” I mean pencils with other writing instruments such as highlighters, pens and Sharpies.
7. Next place your bins or baskets into your junk drawer.
8. Then, move your “like with like” items into their new home in a bin or basket in the drawer. Note: some items will most likely have to be placed in a bin or basket with other items that aren’t the same. Example: flashlights and tools might have to live together.
9. Voila! Your junk drawer is organized!
Were you surprised by how many useful items were in your junk drawer? Let me know, in the comment section below, what unexpected useful items you found in your drawer! If you found there weren’t any useful items in your junk drawer, is there anything you should add to the drawer so it is handy?

Before - a mess
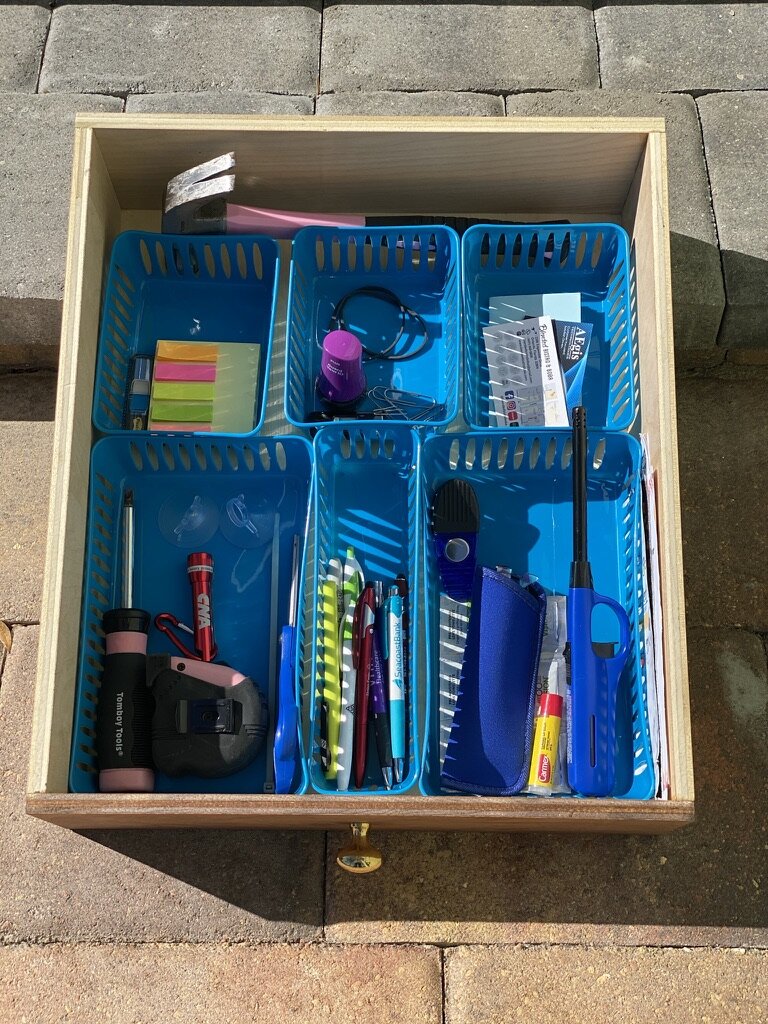
After - organized and easy to grab what you need!
10. Don’t forget to take your “AFTER” photo and compare it to your “BEFORE” photo! Throw away the trash and dispose of your recycling and donate items accordingly.
I hope you found this exercise useful and are proud of what you have accomplished. In my next blog, I will be discussing how to best keep the mountain of mail that is piled up on your desk or countertop in check!
Thank you so much for reading!
Recommended Junk Drawer Organization Tools


Image courtesy of Amazon

Image courtesy of Amazon
Image courtesy of the Dollar Tree

Image courtesy of Amazon